WalletConnect Developer Guide
1. Retrieving Keys
- Enter the Account name associated with WalletConnect.
- Hit the “Get Available Keys” button.

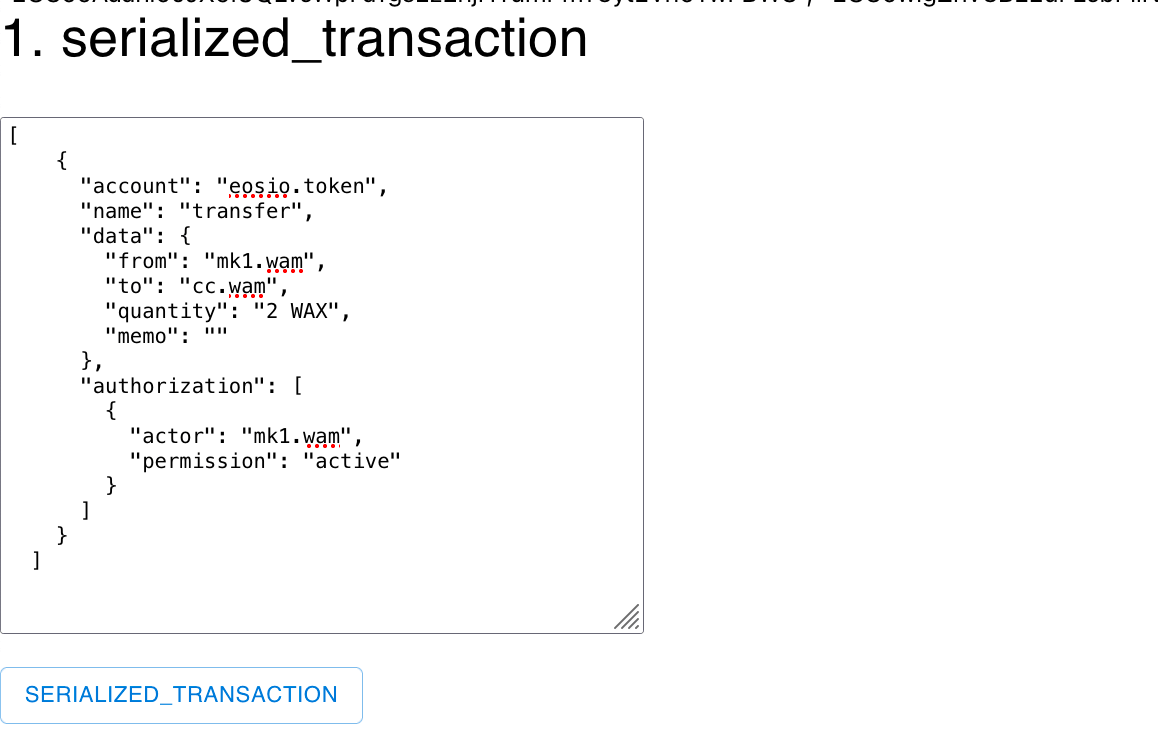
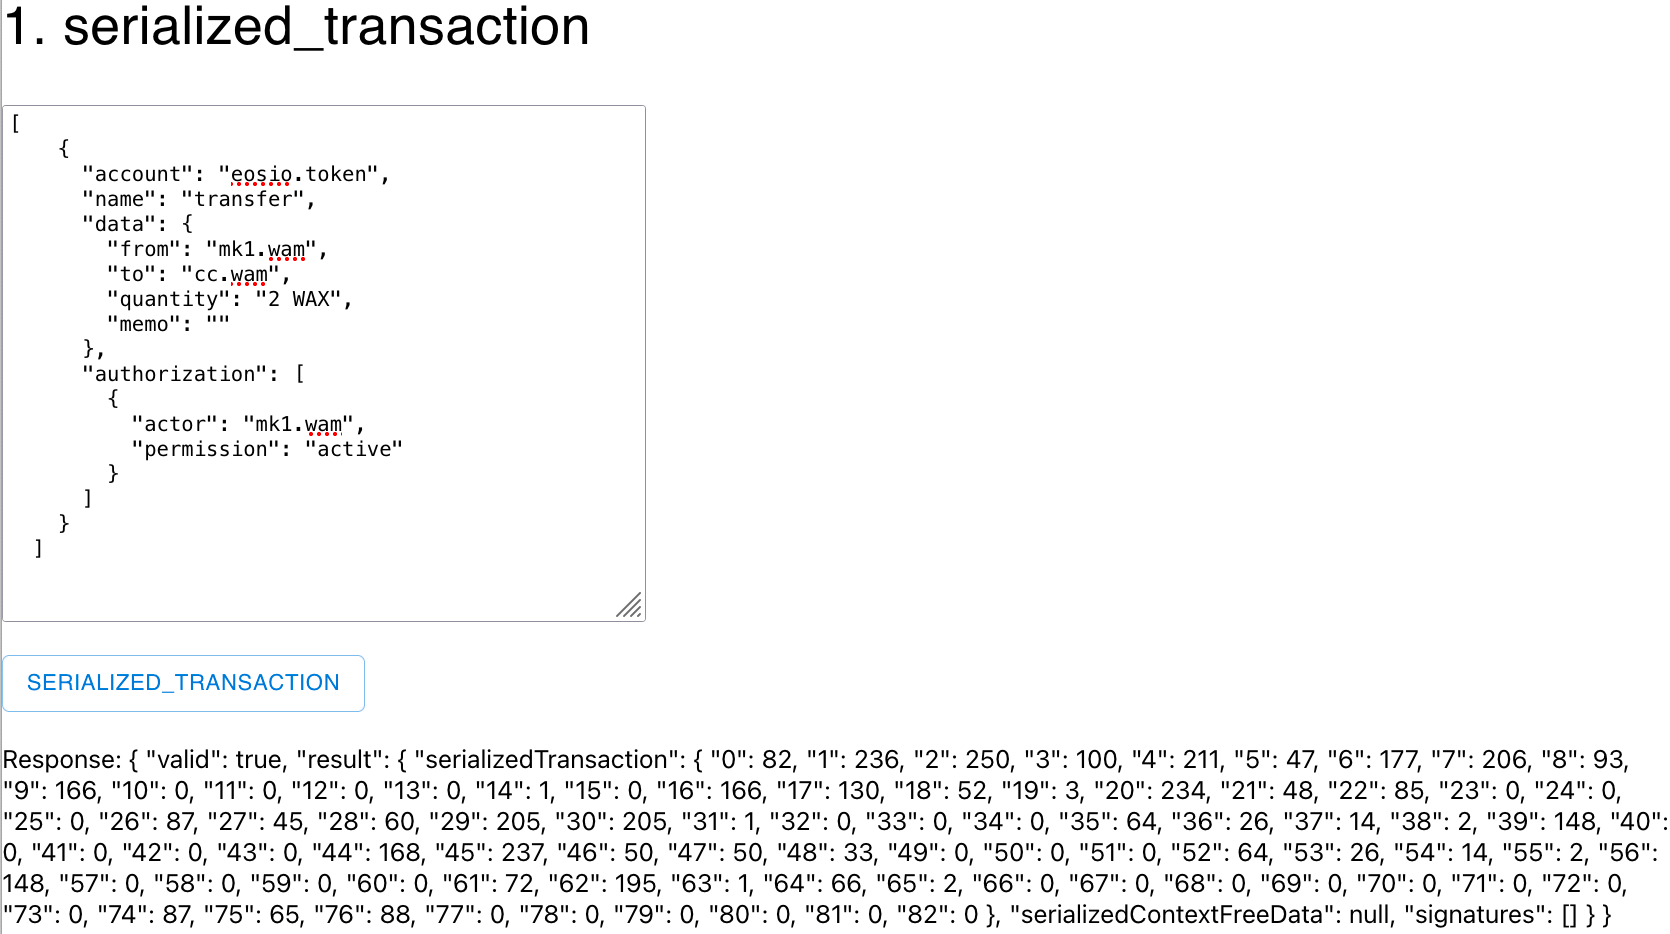
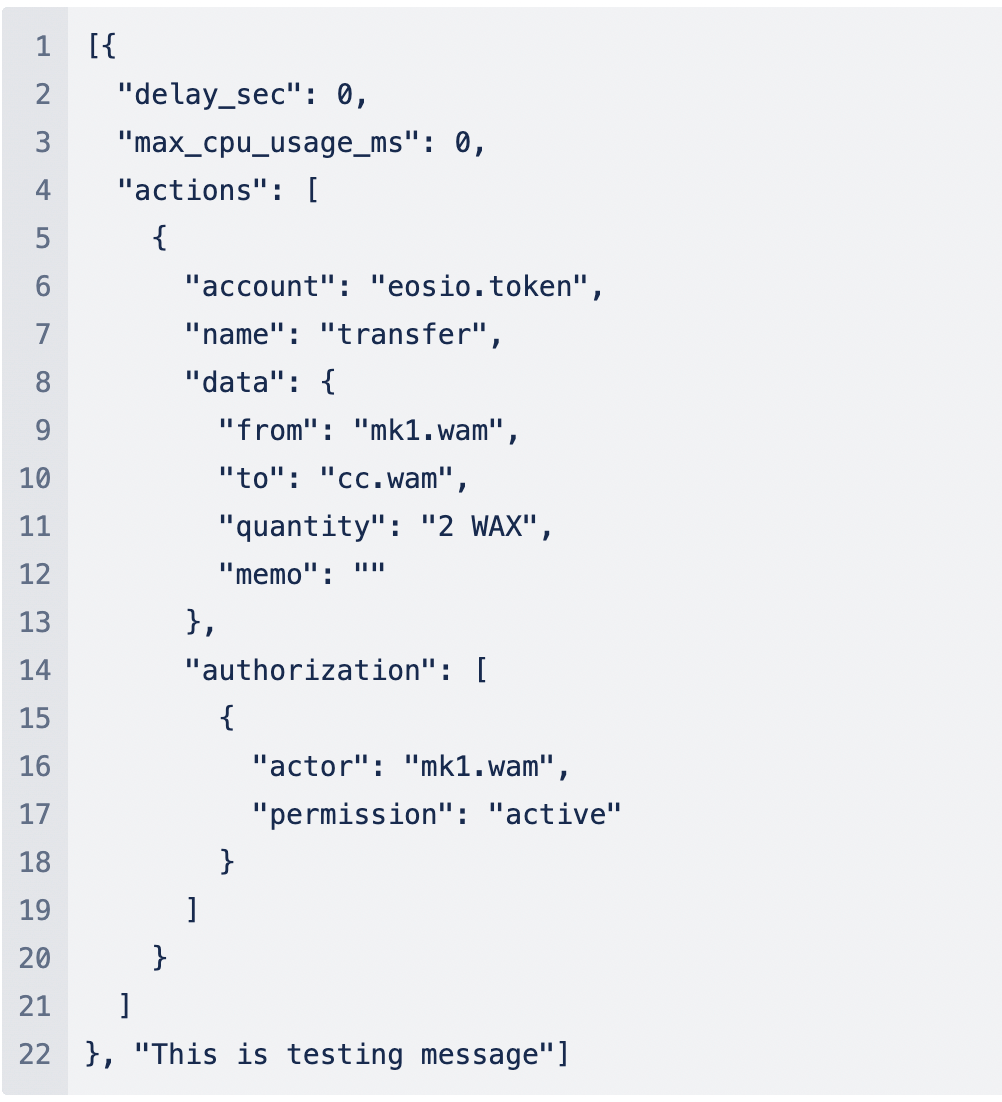
2. Serialized Transaction
Enter the necessary action. A sample would look like:
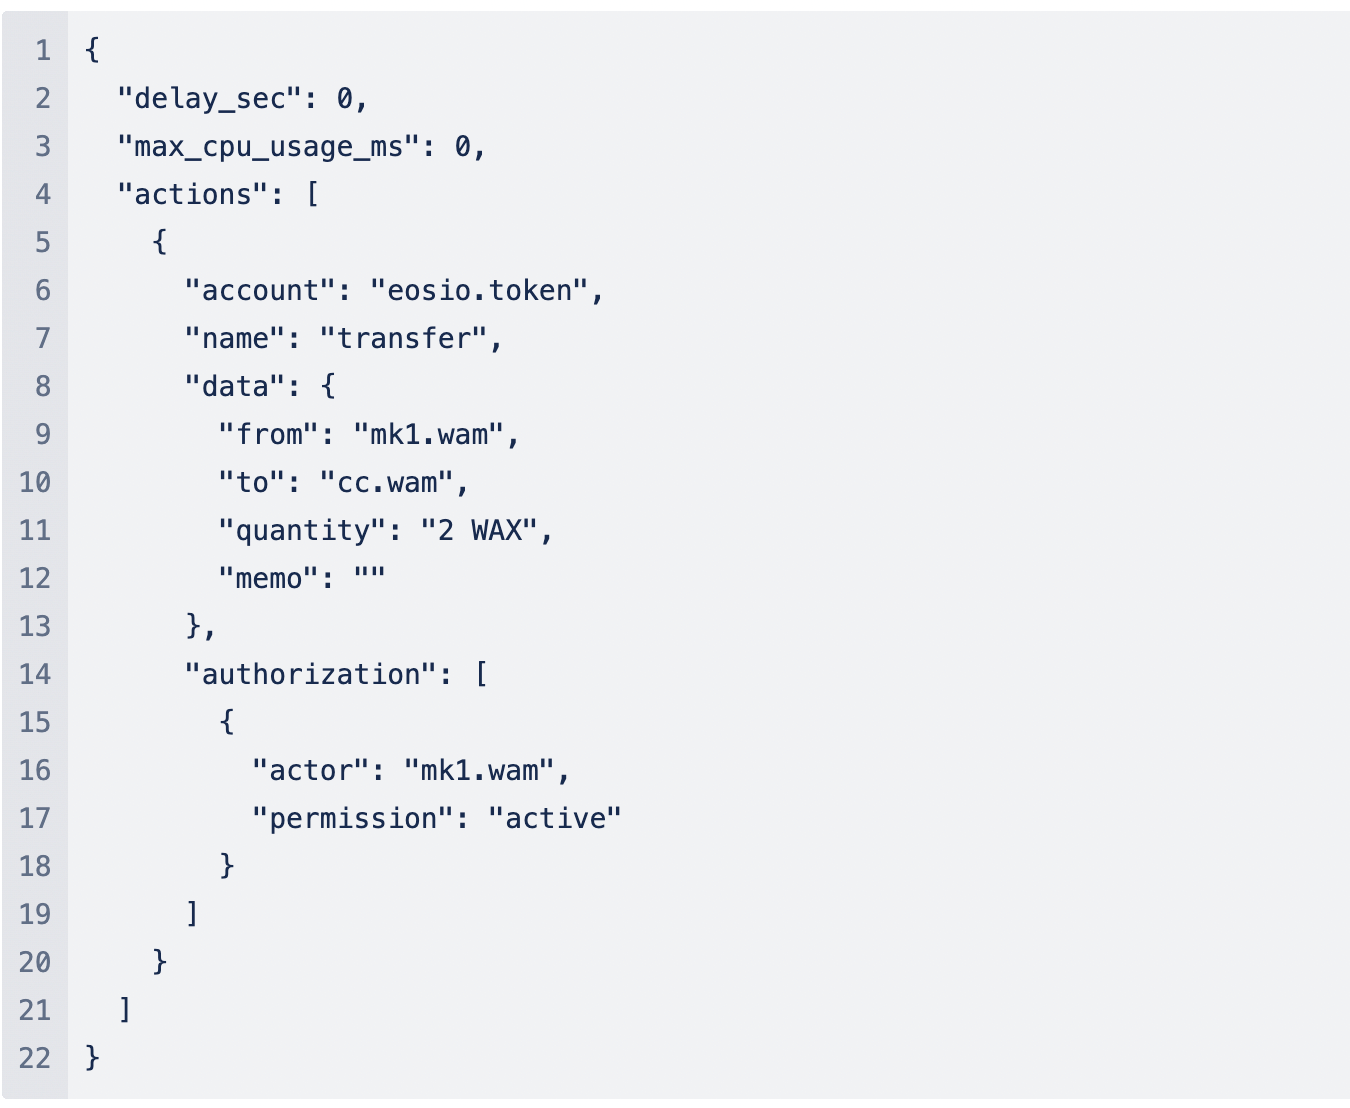
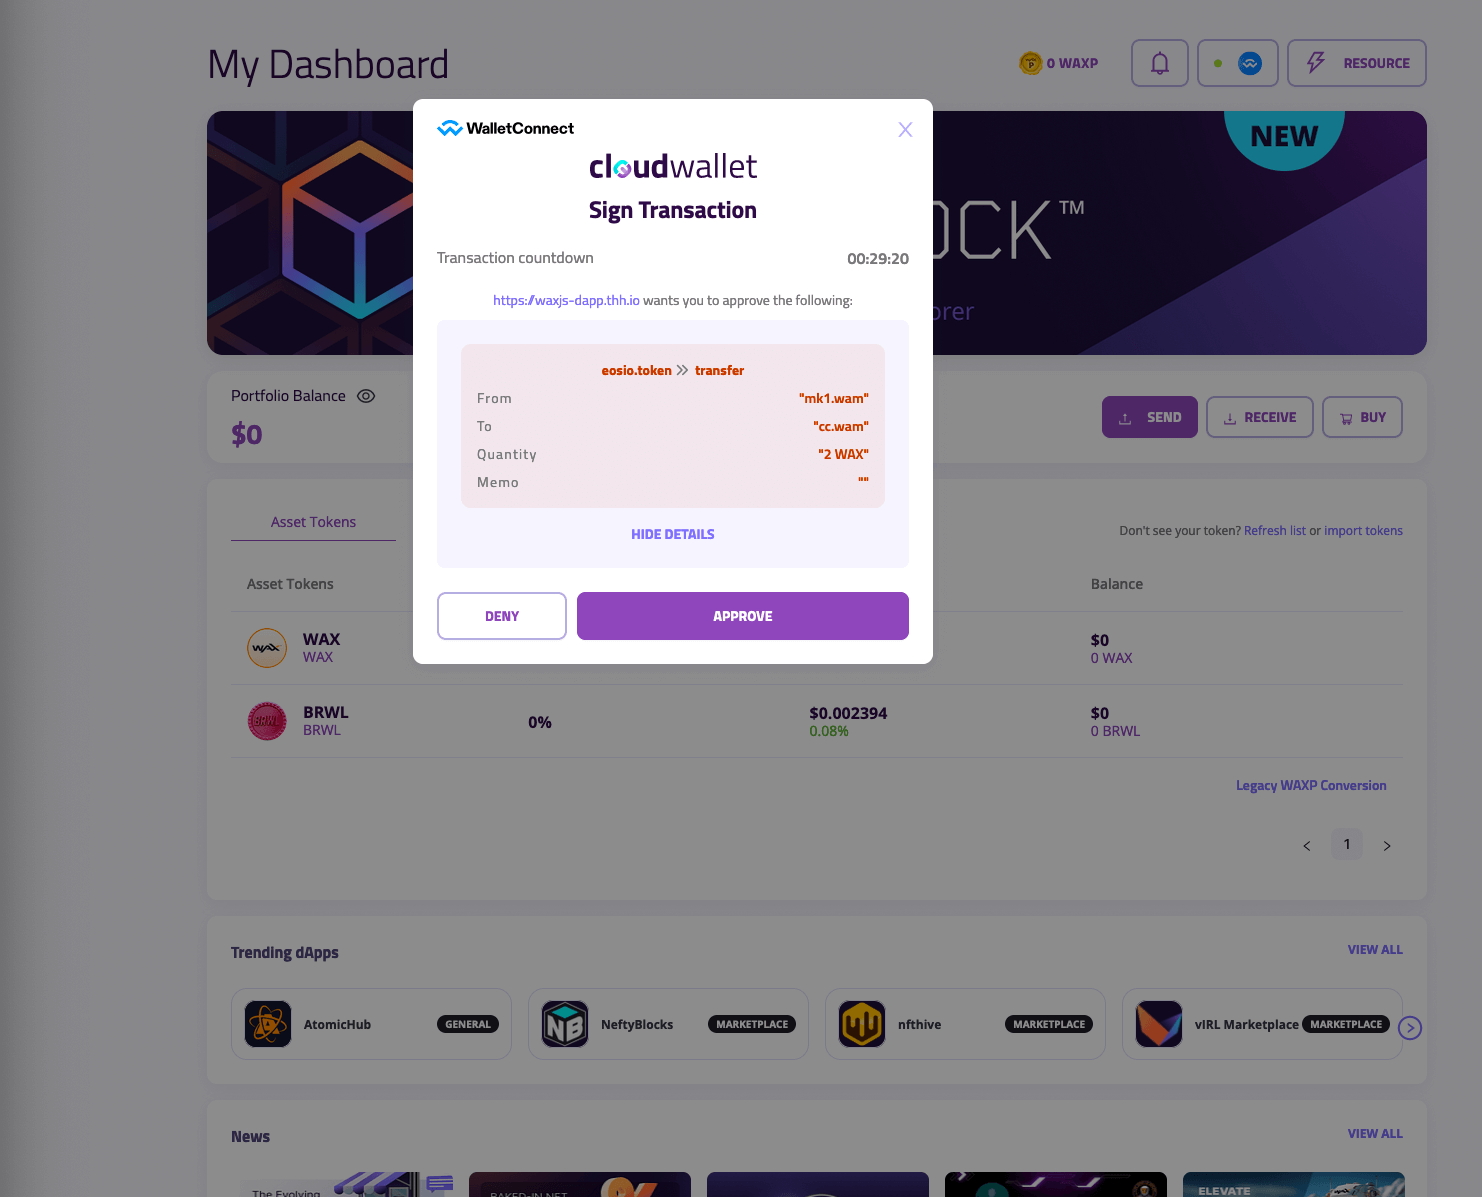
3. Signing Transactions:
- Enter the keys from Step 1 and the serialized data from Step 2.
- Use the provided transaction sample and modify it with your personal information.
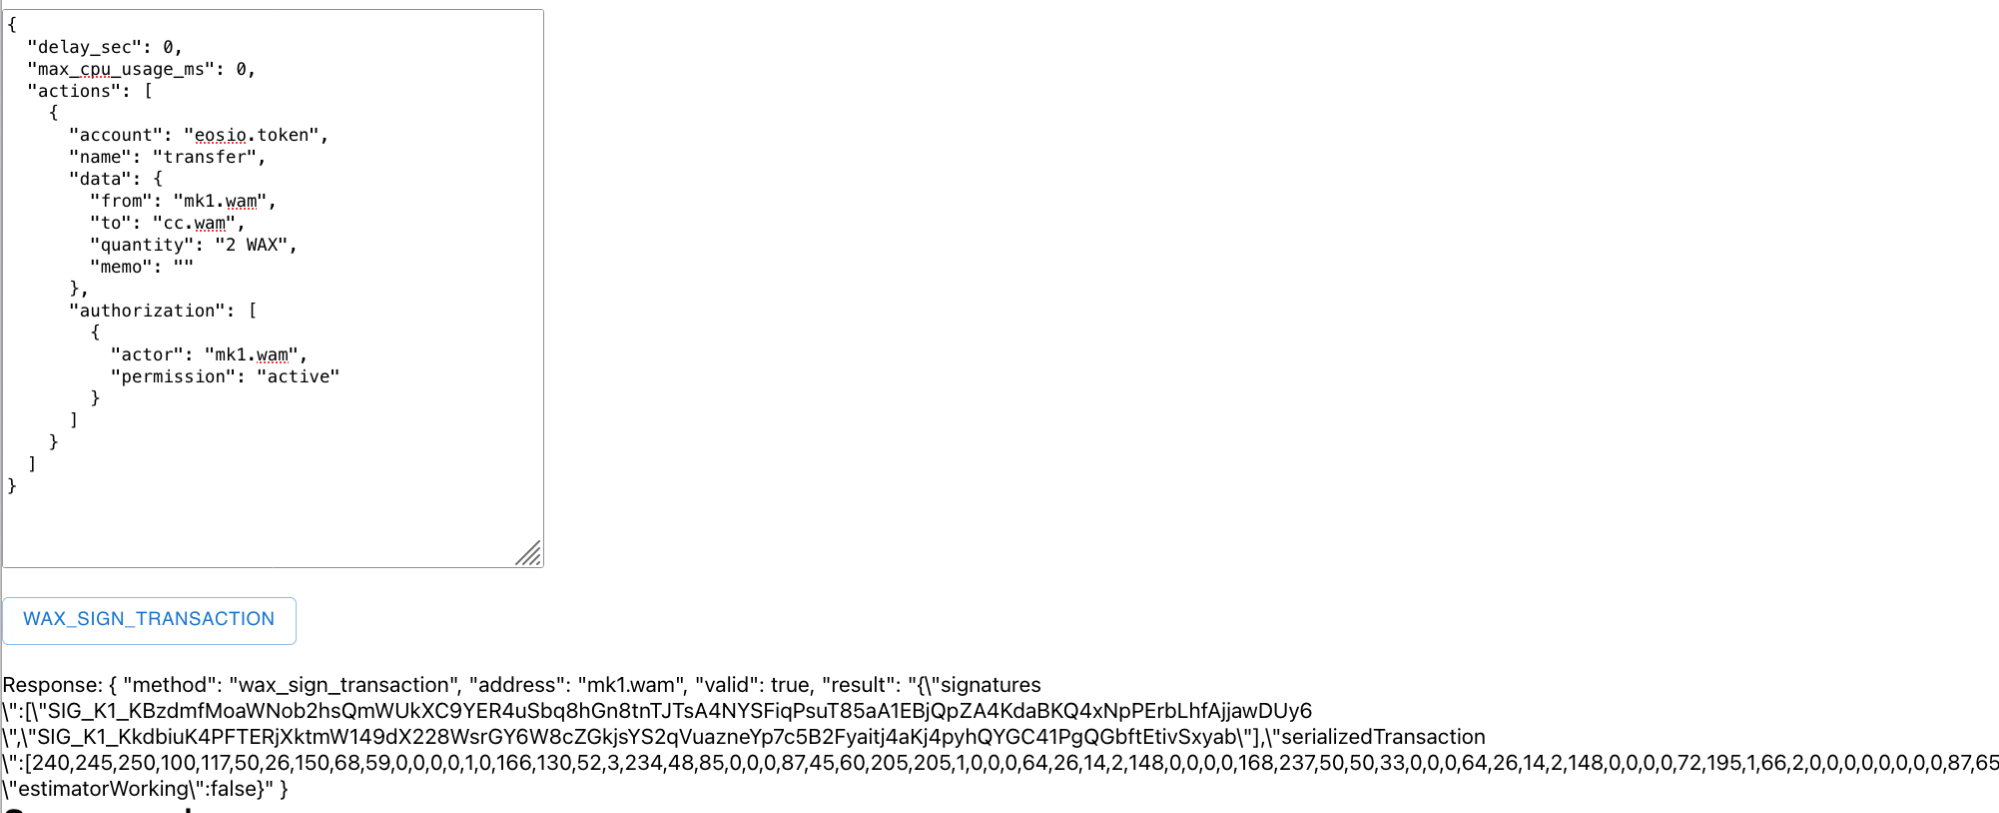
- Click on WAX_SIGN_TRANSACTION.
Once done, approve the transaction pop-up on Cloud Wallet sending the sign transaction request from the dApp. The dApp will then confirm the transaction approval.
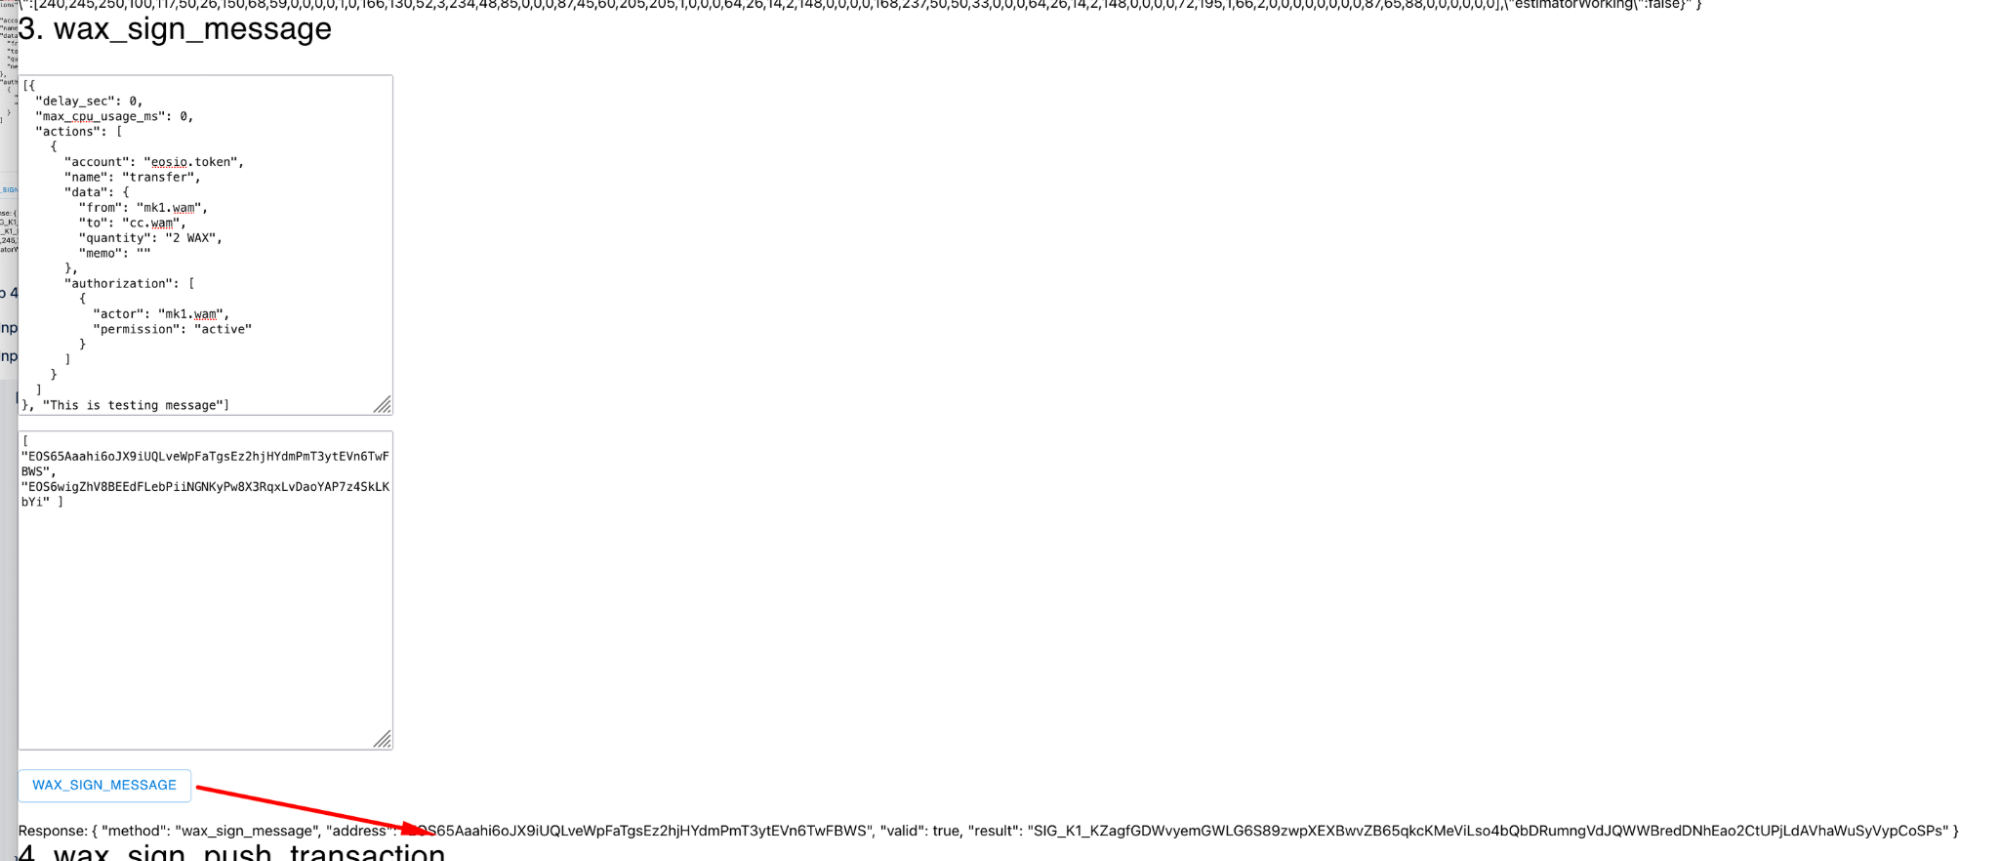
4. Message Signing
- Enter the keys (from Step 1).
- Enter the given message sample.
- Click on WAX_SIGN_MESSAGE.
Upon approval, the dApp will provide a confirmation.
5. Push Transaction Signing
- Use the keys from the initial first step and the serialized data from the second step.
- Modify the given transaction sample with your details.
- Press “WAX_SIGN_PUSH_TRANSACTION”.
Once you give approval, the dApp will send a confirmation.
WalletConnect and dApp integration offers a straightforward way to manage digital transactions. Following the steps mentioned above will ensure a seamless connection and transaction experience. Always stay updated with the latest versions and patches to fix any reported bugs.
Join the WAX Community