Managing AA Templates
If we have to mint multiple copies of the same asset, for example, a sword that is obtained as a reward in a mission, it will be useful to do it with a template. Thanks to the template we will be saving RAM memory, speed up the work and we will keep a coherence in the whole collection.
AtomicAssets has two actions to manage templates:
- createtemplate: Create a template.
- locktemplate: Lock the template to prevent further copies of existing templates from being created.
Create a template
When creating a template we will make use of the data types declared in the schema to which the template will belong and assign values to those attributes. In this way, each time we mint a new NFT from the template we will not need to repeat that information; it is contained in the template.
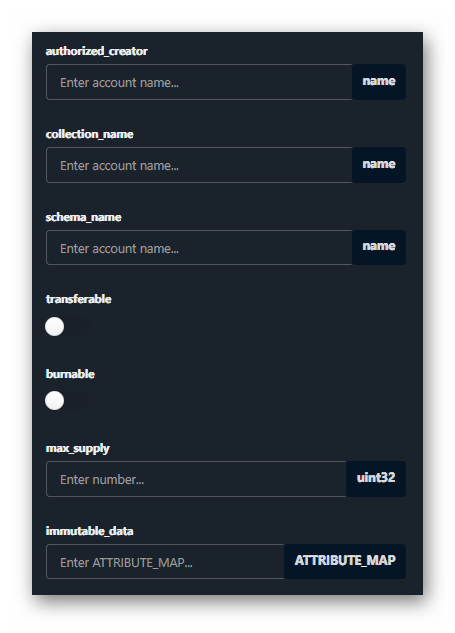
- authorised_crator: Account authorised by the collection to perform the action.
- collection_name: Name of the collection
- schema_name: Schema name (must exist)
- transferable: (True/False) Indicates if the NFT can be transferred
- burnable: (True/False) Indicates if the NFT will be able to be destroyed (Burn)
- max_supply: Maximum number of prints allowed. If 0 it is assumed to be infinite.
- immutable_data: Array of immutable information to be included in all copies created with this template.
Immutable data must be defined in a map of type ATTRIBUTE_MAP consisting of key and value pairs
An AtomicAssets NFT can also contain mutable data. This will be discussed later as it should not be specified during template creation. :::
Let's see how we can create a template to mint copies of a character called "Player A" in our game:
// Collection creator
const auth = 'arpegiator21';

// Collection name (eosio name format)
const colName = 'arpecol11111';

// Schema name
const schemaName = 'player';

// Burnable and transferable
const burnable = true,
      transferable = true;

// Infinite supply
const maxSuply = 0;

// Collection description
const immutableData = [
    {
        key: "name",
        value: ["string", "Player A"],
    },
    {
        key: "img",
        value: ["string", "QmaNCMQ3mD1ZxVPhac6vEUY2pidxwMQC2u6sNwuurweeJ5"],
    },
    {
        key: "class",
        value: ["string", "Warrior"],
    }
];

// Create schema
(async()=> {
    const result = await createTempl(auth, colName, schemaName, transferable, burnable, maxSuply, immutableData);
    console.log(result);
})();
📝 Note
"ipfs" and "image" data are treated as "string".
And call to action...
/*
* Create a template
*/
const createTempl = async (
auth,
colName,
schemaName,
transferable,
burnable,
maxSupply,
immutableData
) => {
try {
const result = await apiRpc.transact(
{
actions: [
{
account: "atomicassets",
name: "createtempl",
authorization: [
{
actor: auth,
permission: "active",
},
],
data: {
authorized_creator: auth,
collection_name: colName,
schema_name: schemaName,
transferable: transferable,
burnable: burnable,
max_supply: maxSupply,
immutable_data: immutableData
},
},
],
}, TAPOS
);
return result;
} catch (error) {
console.log(error);
return false;
}
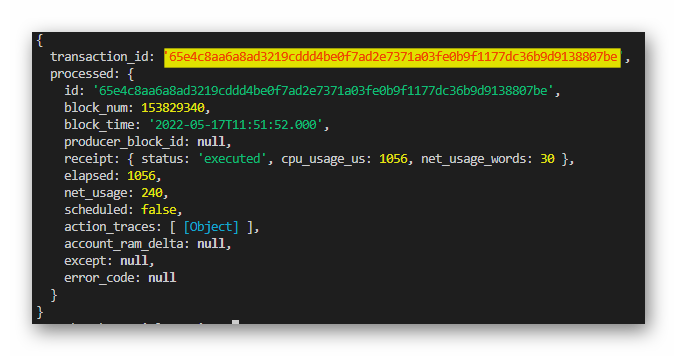
}Once the action is executed, and if there are no problems, we will get the transaction information as a return. We can capture the transaction ID to analyse the response from the AtomicAssets smart contract.
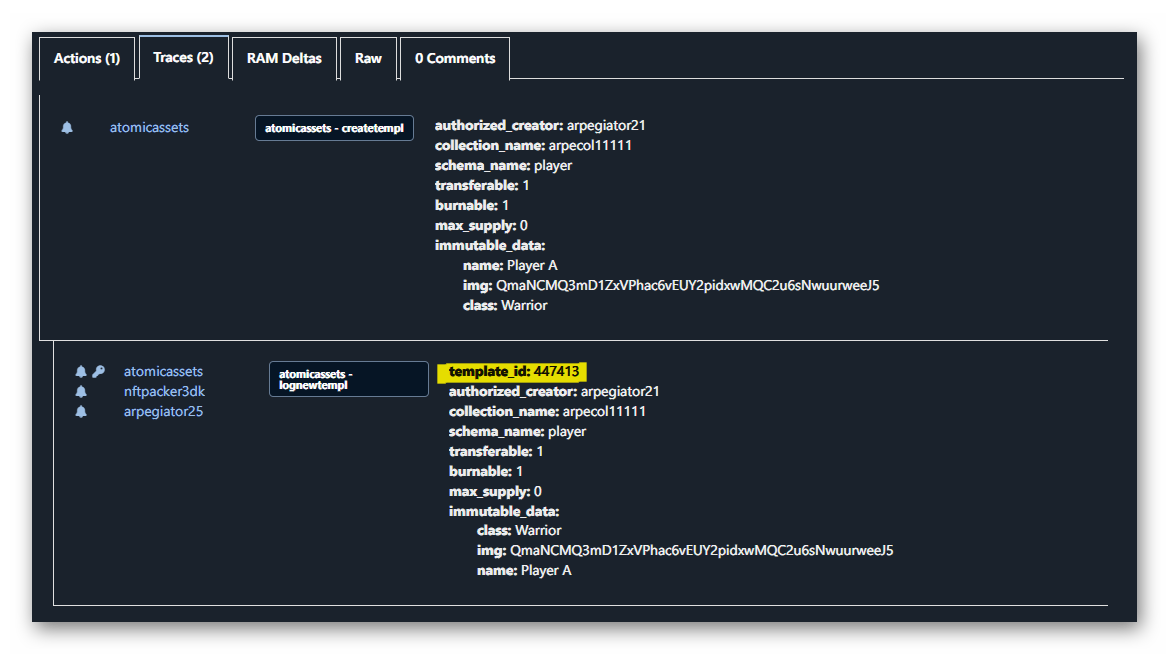
If we analyse the transaction in a explorer, we can see that the smart contract replied with another action: "lognewtempl". This action includes a piece of information that will be of vital importance to us: the ID of the newly created template.
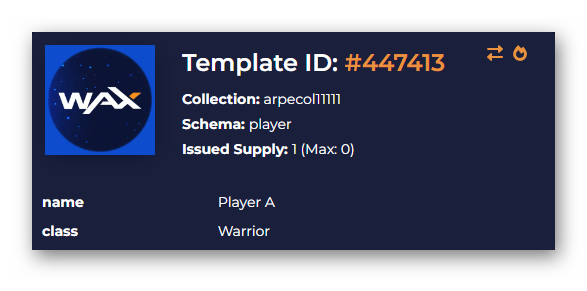
We can also go to the Atomic market website (AtomicHub) and check out the templates created by the collection:
Lock a template
Whether a template has been configured with a limit of impressions or to infinity we may wish to lock a template to prevent further impressions. For example, we can mint NFTs during a 3-day event from an infinite template and, at the end of the time limit, lock the template. The max supply would be the total NFTs minted so far.
**Note: It is not possible to lock a template if it does not have at least 1 NFT created. :::
For this AtomicAssets has the action "locktemplate".
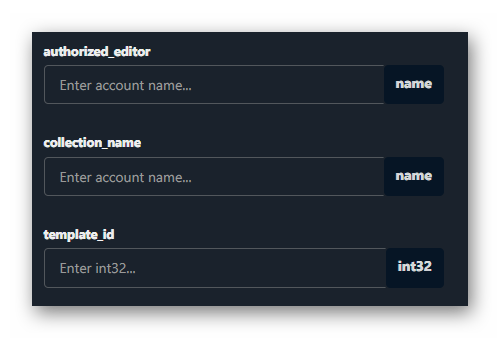
- athorized_editor: Name of the account authorised by the collection. It must be the one who signs the transaction.
- collection_name: Name of the collection.
- template_id: ID of the template to block.
This is a call to action with simple parameters, so we will go straight to the example call:
/*
 * Extend a schema with new data types
 */
const lockTemplate = async (
  auth,
  colName,
  templateID
) => {
  try {
    const result = await apiRpc.transact(
      {
        actions: [
          {
            account: "atomicassets",
            name: "locktemplate",
            authorization: [
              {
                actor: auth,
                permission: "active",
              },
            ],
            data: {
              authorized_editor: auth,
              collection_name: colName,
              template_id: templateID
            },
          },
        ],
      }, TAPOS
    );
    return result;
  } catch (error) {
    console.log(error);
    return false;
  }
}Nota: This action is irreversible. :::