Creating a bp.json
📝 Note
The current bp.json standard is updated in the GitHub Repository. This guide will explain everything you need to get started. You can find the latest updates in the Repository
What is a bp.json?
The bp.json contains the most important pieces of information about the block producer and their nodes, such as API-Endpoints, geographical location, emergency contacts, and more. The standardized form of the bp.json makes it easy for companies and individuals to use the block producer’s nodes and information. Through this method sites such as (bloks.io) can e.g. get the profile picture for your guild. Here are some examples of bp.json for the WAX Mainnet:
Creating the bp.json
You can copy the template bp.json into your Texteditor of choice. Every information you have to fill out should be pretty straight forward, however we will cover the most important anyways. If you need further information, have a look at the GitHub repo above and read some bp.json from other guilds:
General Information:
producer_account_name:
Self-explanatory. However, if you are not familiar with the naming scheme in the Antelope ecosystem: It is important to note, that you have to use the name that you also have used (or are planning to use) for the action “regproducer”. That means that your official guild name may differ from the guild name you use on-chain.candidate_name:
This is the field, where you can fill in the official name of your guild. Spaces are allowed.github_user:
Important: List atleast one GitHub Account from your team here. These accounts could potentially be used to give you access to private Repositories.chain_resources:
You can list one website here, containing links to your chain related resources, such as snapshot sites or backups. An array is not allowed here.other_resources:
Got any awesome tools or services you are providing? Great, you can list an array containing all the links to the services under this section.Social accounts:
I think we don’t have to explain how to fill in your social information here. However, it is important that someone of your guild actually regularly checks these accounts since this is how someone may contact you in case of an emergency.
Nodes
Node location:
How to get the coordinates of the nodes? The simplest way is to use Google Maps. Just click with the mouse on to the map where you want to have the location of the node. A small popup should appear, containing two numbers. The first number is the latitude and the latter the longitude.Node type:
Pick producer, if you are listing a producer node. Pick seed if you are listing a p2p-node. Pick query if you are listing an API node.Features (only if node type query):
Chances are, you are not only hosting a “normal” chain-Api, but you are also hosting a additional services such as a History. You can specify which services you are hosting with the feature section. Have a look here at the available features and list them accordingly. Your typical Setup with History v1 & Hyperion & Wallet Api enabled will have the following features:
["chain-api", "account-query", "history-v1", "hyperion-v2"]Hosting an Atomic Assets API would have the following features array:
["atomic-assets-api"]- Endpoints:
Self-explanatory. However keep in mind that you may want to produce on multiple chains, therefore choosing domains such as “peer.waxproducer.io” is not suitable. Instead, use a domain containing the chain’s name. Such as “peer1.wax.waxproducer.io”. To get an idea, what domains to use, have a look at the endpoints on the Validator or Validationcore of other block producers.
bp.json for Mainnet AND Testnet
Since many block producers are active on multiple chains (this is even the case when you are producing on both the Mainnet and Testnet), the bp.json is not actually named bp.json but after the chains name (different names for Testnet and Mainnet). So for the WAX Mainnet, this would be “wax.json” and for the Testnet e.g. “wax-testnet.json” or "waxtest.json”.
Hosting your bp.json
Now, that we have written and named your bp.json. All that is left to do, is to host the JSON on your website. This has to be the same URL you have used (or are planning to use) for the “regproducer” action. So basically just your standard domain. Please don’t use something like “resources.example.com”, just stick to e.g.“example.com”.
Just host the bp.json at the root of that domain. So for example "example.com/wax.json”.
Pushing the bp.json on-chain
If you have successfully created and hosted your bp.json, the next step would be to push that bp.json on-chain.
Why push on-chain?
Bp.jsons that are published on-chain offer a couple of benefits over those that are hosted on a website:
The bp.json will still be available even if the website is temporarily offline. Dapps can easily find all producerjsons in a single place. The signature from the block producer’s account offers verification of the bp.json and history with more insights about the changes in a producerjson is provided.
1. Pushing via Cleos
If you have Cleos installed on your machine and have added either your active or custom permission key (more on this later) to your wallet you can push the producerjson with a single command.
Variables:
- URL = (optionally) If you have problems connecting to a local node or don’t have hosted a node locally, use this option with one of the publicly available endpoints: e.g
-u https://wax.blacklusion.io - OWNER = Account name of producer: e.g.
blacklusionx - FILE = Filename of producerjson. You will have to: e.g.
wax.json - KEY = The name of you want to use for authentication: e.g
activeorproducerjson
cleos URL push action producerjson set '{"owner":"OWNER", "json": "'printf %q $(cat FILE | tr -d "\r")'"}' -p OWNER@KEYJust substitute the variables with your values.
cleos -u https://wax.blacklusion.io push action producerjson set '{"owner":"blacklusionx", "json": "'printf %q $(cat wax.json | tr -d "\r")'"}' -p blacklusionx@producerjson2. Pushing via bloks.io
Especially when you are starting out, bloks.io is a great option, since it offers a more user friendly way than a CLI-Command.
Go to the producerjson contract:
Click on this link to access the producerjson smartcontract.
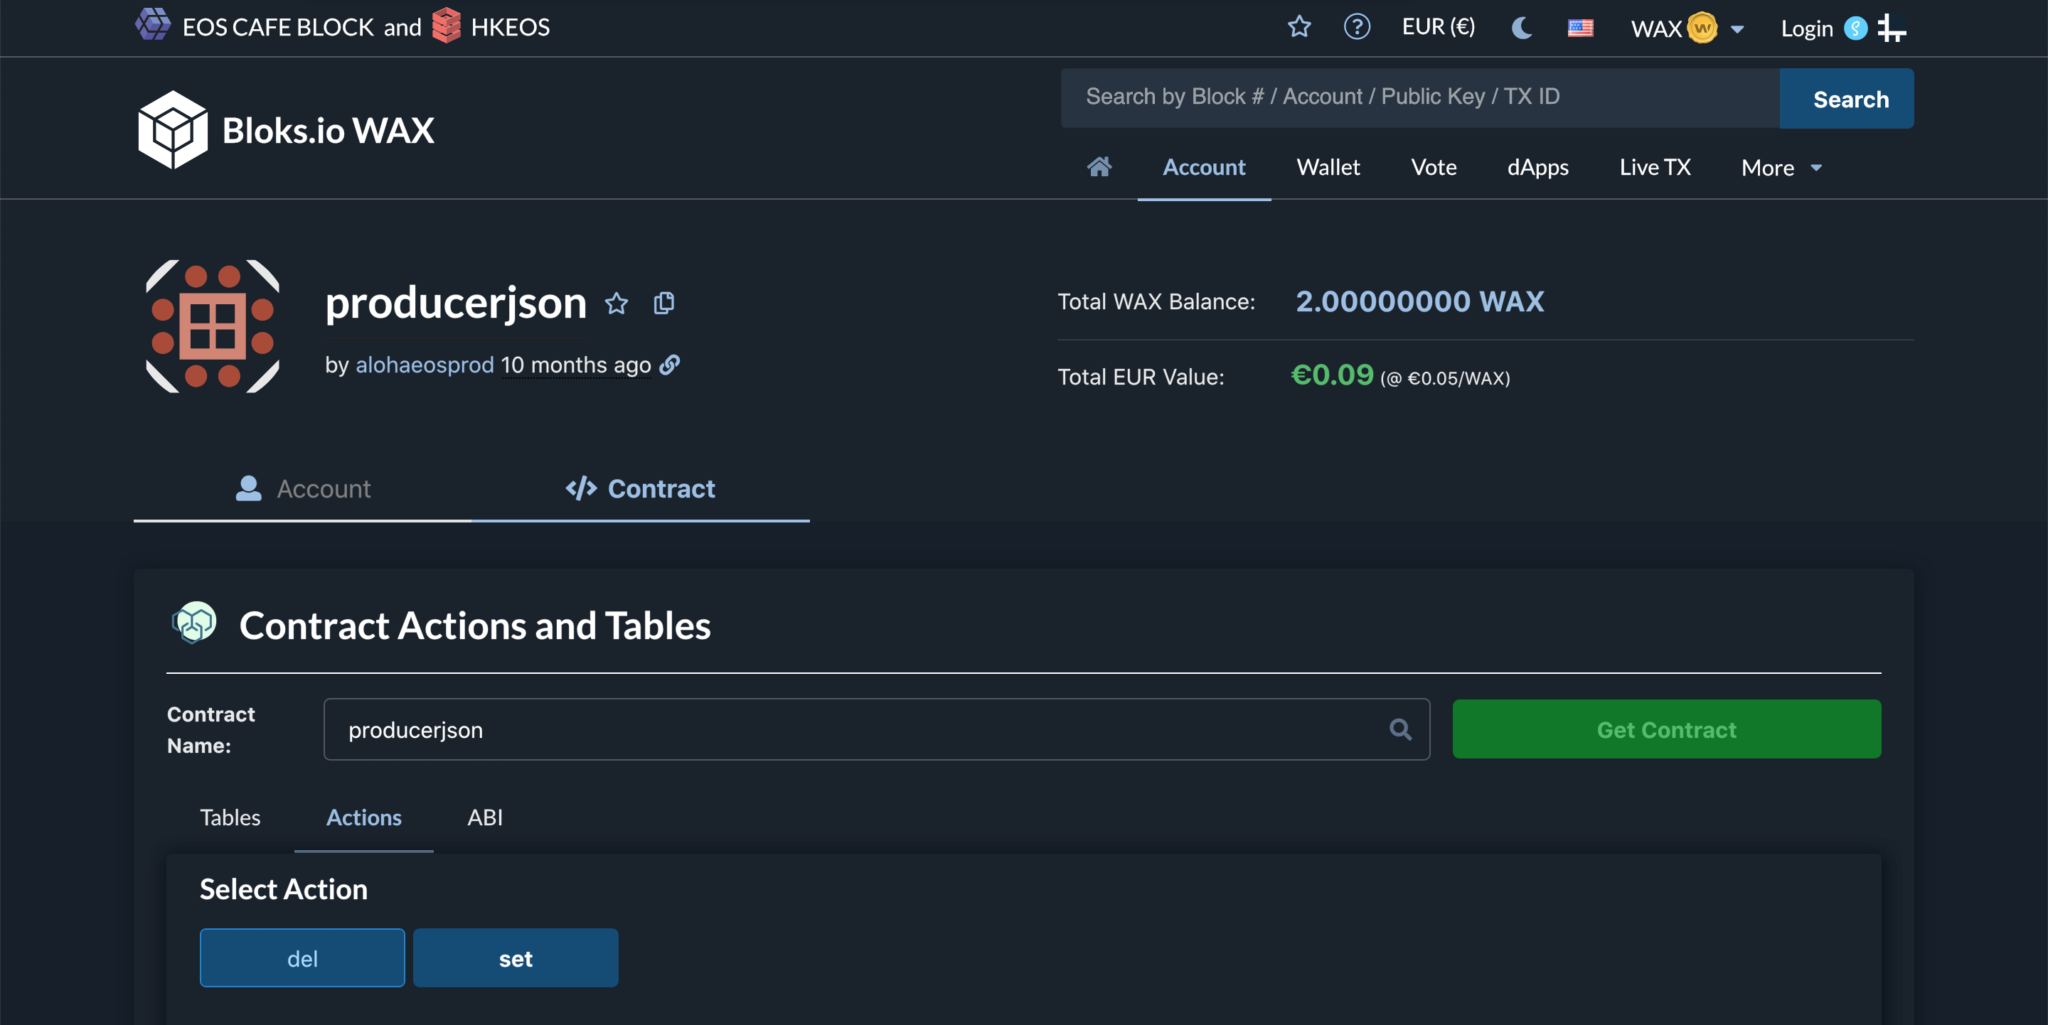
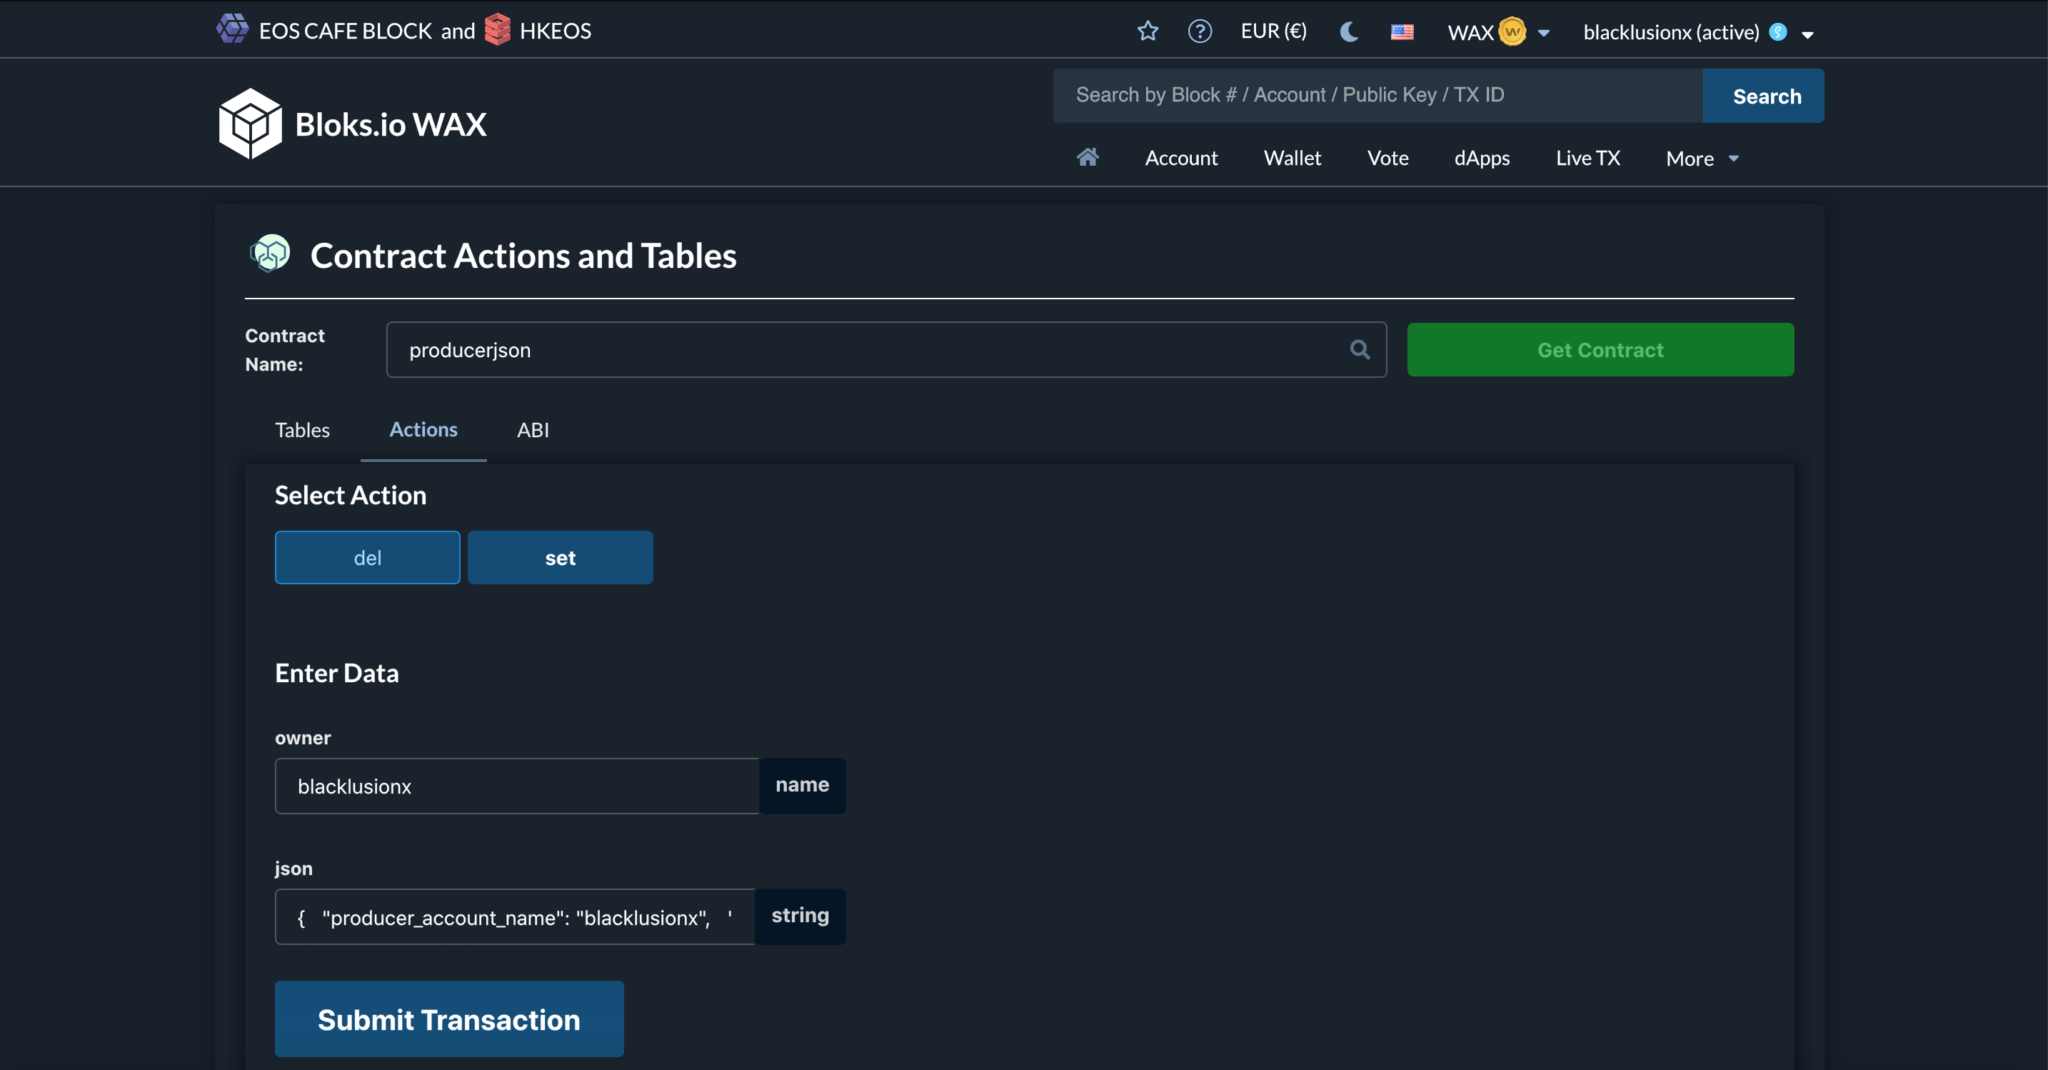
Fill out the information and submit
Select “set” and fill in your information. As account name just use the account name you have registered producer with and for the json field just copy the actual content of your bp.json. Don’t use the URL to your hosted bp.json here. Finally click on “Submit Transaction” and choose your wallet of choice.
If you have done everything correctly bloks.io will confirm your successful transaction. You can have a look at this sample transaction here.

Custom permission
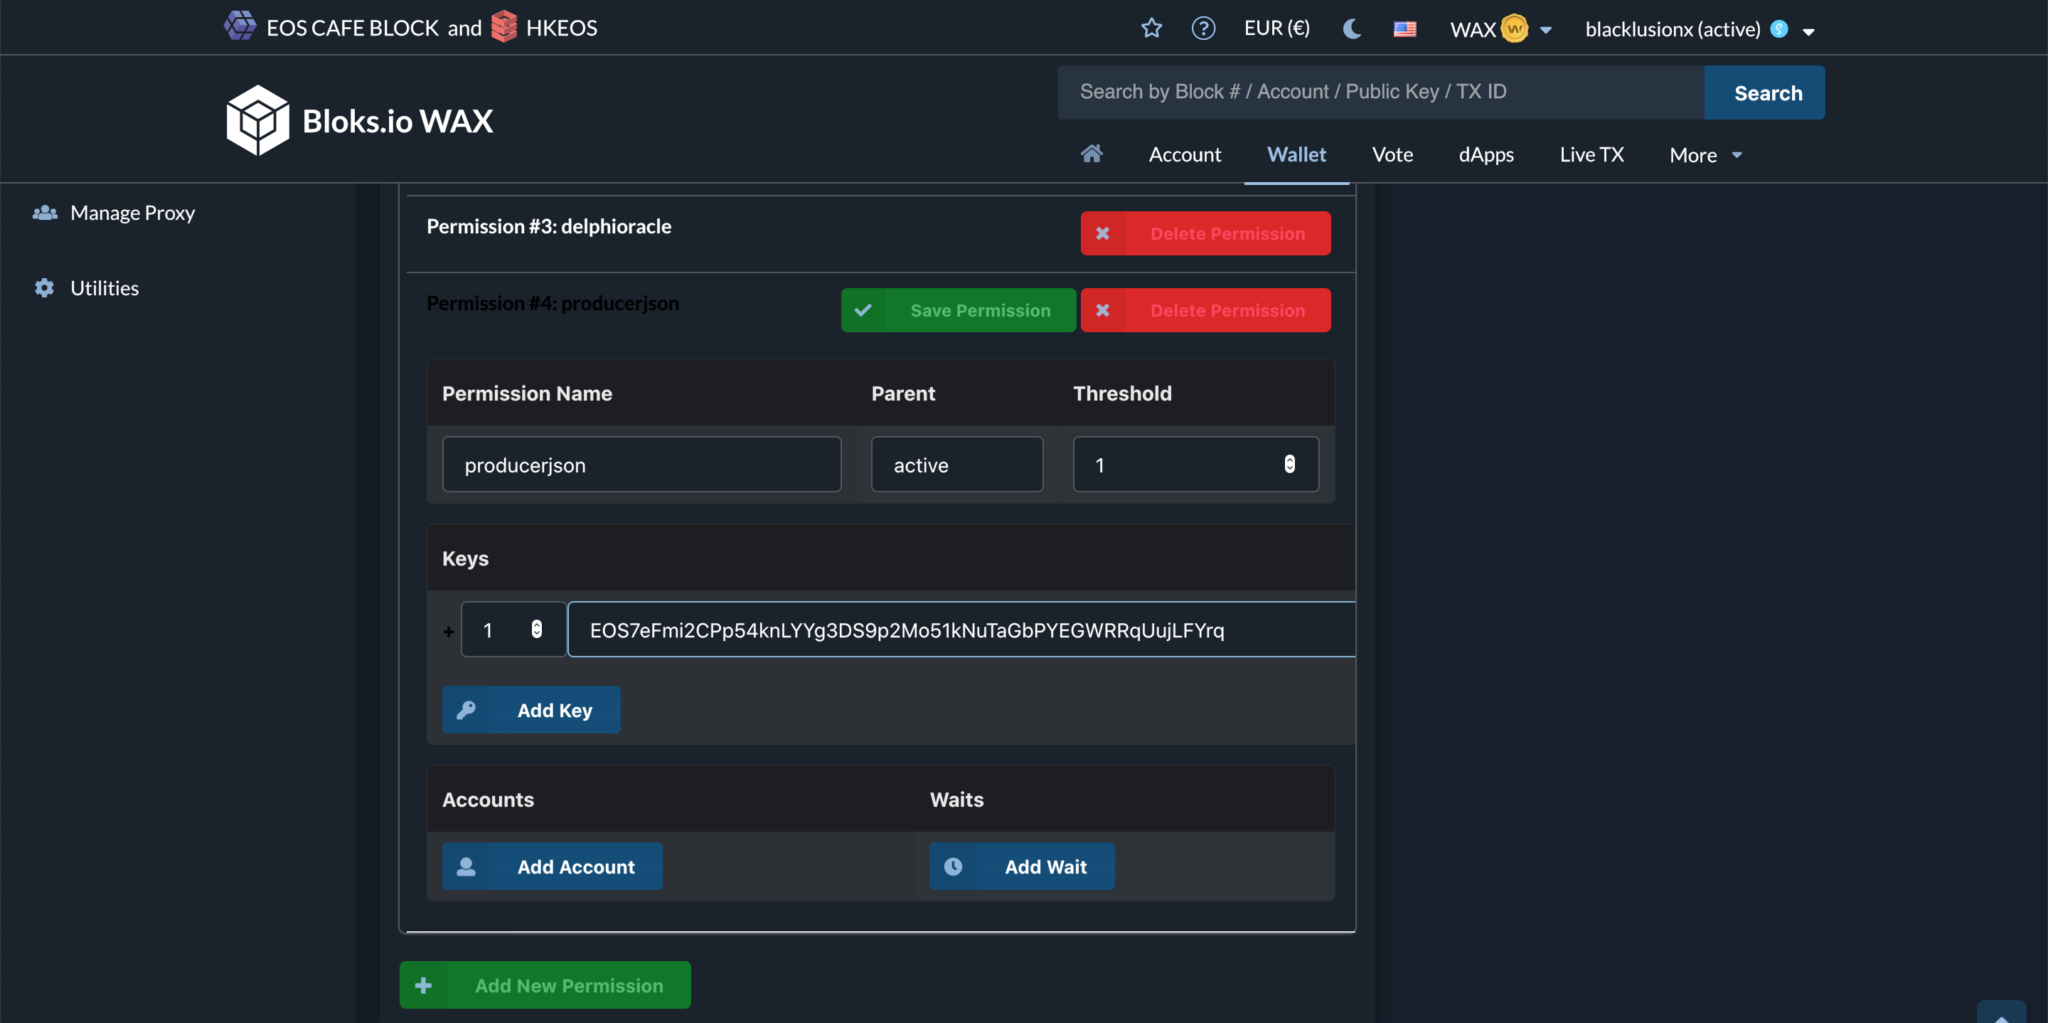
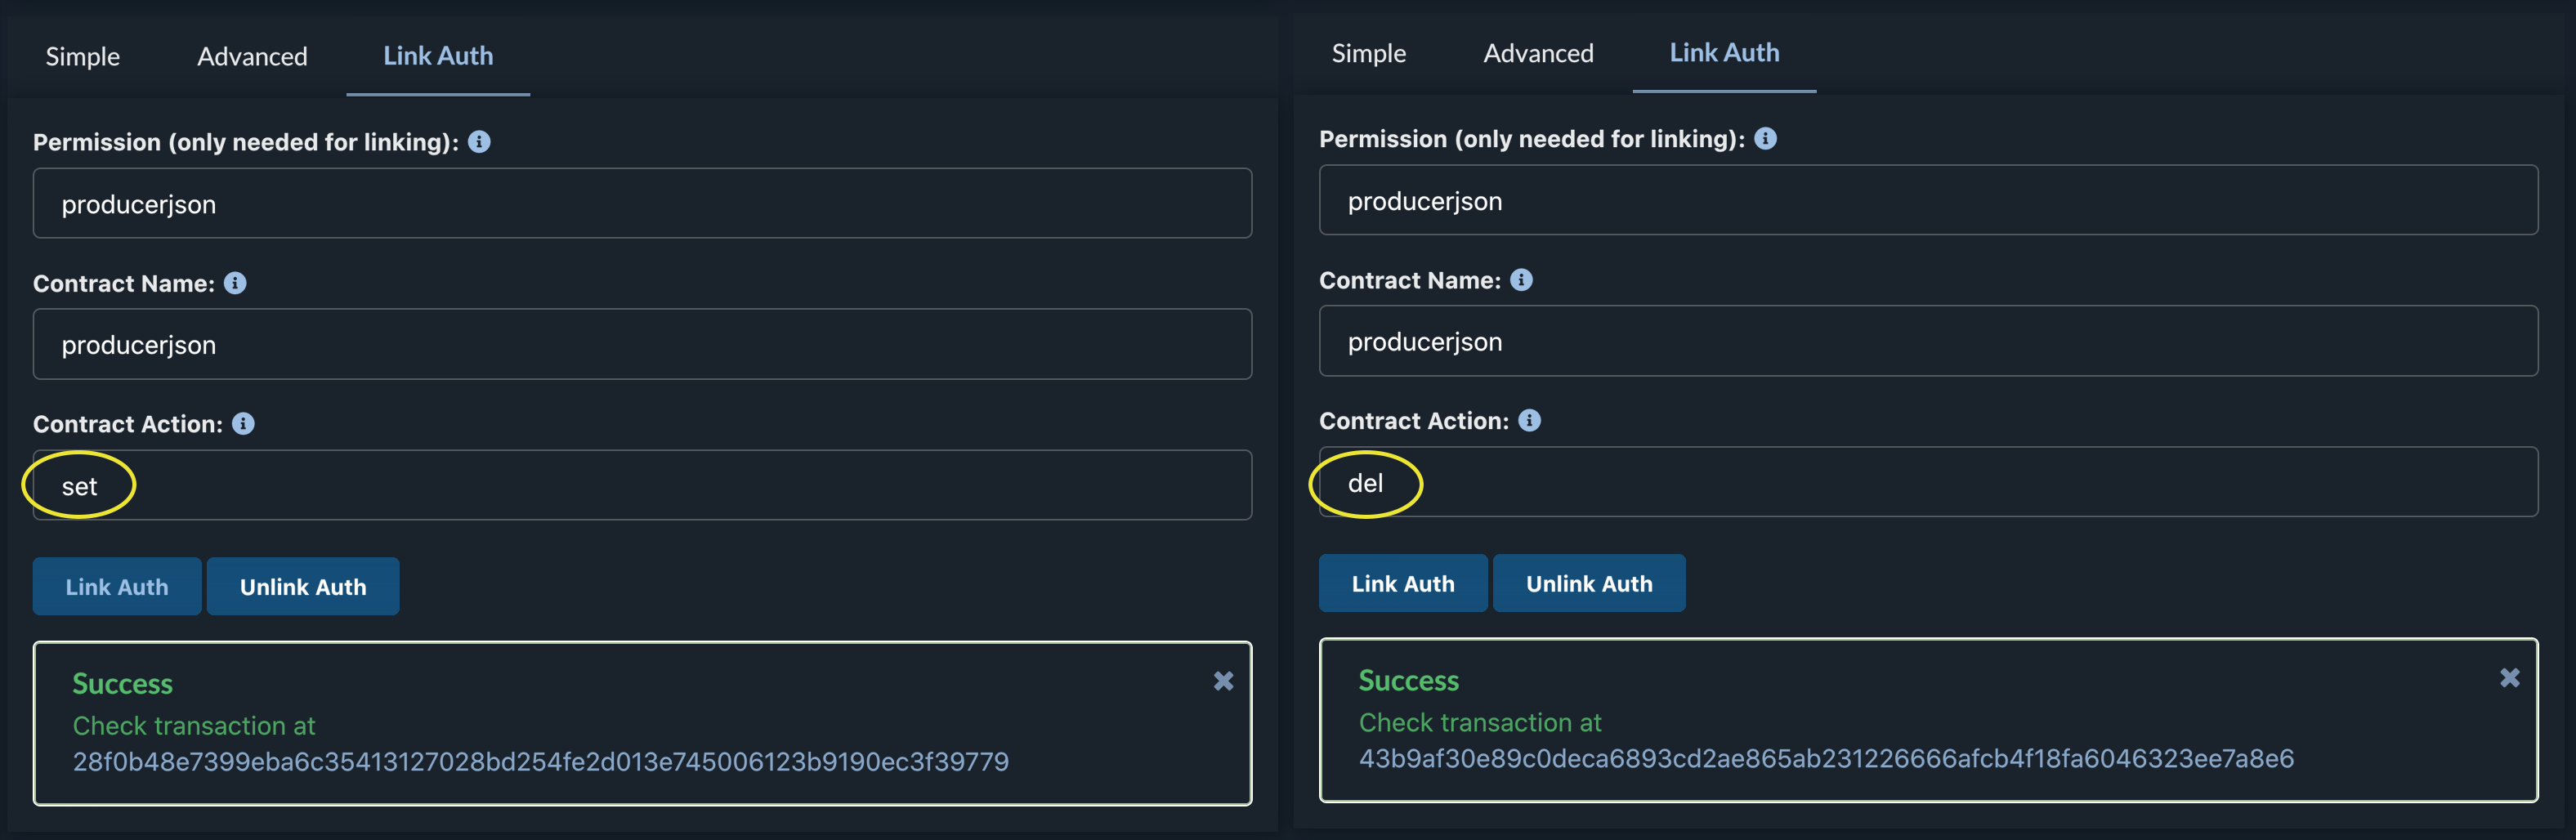
For added security or if you often have to push the bp.json, we highly recommend using a dedicated key for pushing the bp.json. This prevents the key (or whatever script or person gets hold of it) to execute other actions.
The following pictures will show you which information you have to fill in, in order to set up the producerjson permission.
Important: Don't forget to update your chains.json to contain the name of your bp.json and the according chainId.
Helpful Links
- Official Repository: https://github.com/eosrio/bp-info-standard
- Tool to validate your bp.json: https://validate.eosnation.io/wax/producers/